If you couldn't tell by that cheesy smile, we are really enjoying our newest creation over here. Talk about hours of entertainment! As a former teacher, I love any kind of play that is educational. With this board, you can work on learning about letters, numbers, animals, or really anything! Win for Charlie, win for Mom.
Inspiration for a magnet board for our playroom first struck when I saw this clever drip-pan idea on Pinterest. I loved the idea, but I wanted something that would hold up a little better and look nicer on our wall. I also didn't love that most drip pans have the words "DRIP PAN" in large letters across the side. So I started looking for other options and found out that sheet metal can be purchased pre-cut in the convenient size of 24" x 36". What is fantastic about this size is that it's a very common picture frame size as well.
This was a crazy cheap project too! I only spent $10 on the sheet metal and $20 on a poster frame at Walmart. The frame was originally black, so I did add another step of painting it white so that it would look nicer in our playroom.
Oh, I love a good, cheap instant gratification project. Here is how I did it.
I purchased this sheet metal at Home Depot for only $9.75. I used the online ordering option, but when I went to pick it up at the counter, the sheet they had picked out for me had a tiny ding on it. I opted to trade it out and pick one that looked nicer in my opinion. The sheet metal comes in this nice cardboard packaging, but the sides are a little bit sharp when you take it out. You'll want to be careful not to cut yourself when you're working with the sheet metal.
I also bought a 24" x 36" poster frame at Walmart. You can save money if you find a frame that does NOT have glass in it. The one I bought had a plastic film attached to the frame. I was able to remove it easily, and painted my frame with a few coats of glossy white spray paint before I put the sheet metal in it.
Then, I laid the empty, painted frame face down, and put the sheet metal in it just like you would frame a picture. Don't worry if it doesn't go in just perfectly at first. It took a little manipulation to get some parts of the metal past the picture fasteners in the back.
You can see here that the metal isn't all the way in the frame yet. I had to go from the other side to sort of "bend" (but not actually bend) the sheet metal to get it past the metal fasteners along the sides. It's a really forgiving material and doesn't dent very easily, so don't worry if you have to do this too.
Once the metal sat flush to the frame, I just needed to put the original backing back on to the frame. In my case, this was just a piece of cardboard that came with the poster frame.
Once the frame was all put together, I just had to figure out how to hang it.
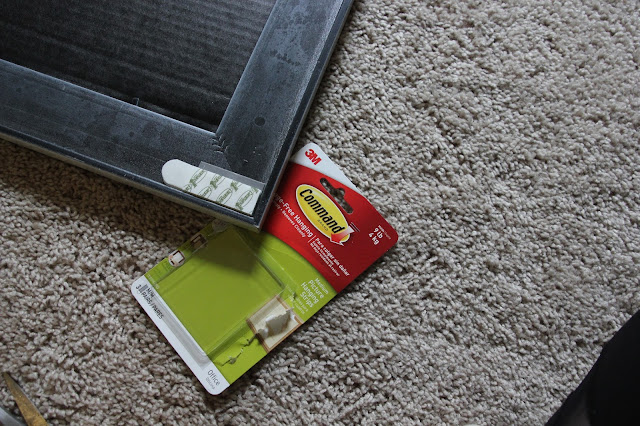
My go-to hanging devices are these Command Picture Hanging Strips. When you use them on all four corners, it is very secure to the wall (perfect for not so gentle toddlers) and very EASY!
The issue I ran into here was that my frame had a raised border that made it difficult to hang with the strips. My solution was to use this Scotch Exterior Mounting tape underneath the Command Strips to give them a little more height. I used two layers of Scotch mounting tape and one Command Strip per corner.
Next was peeling the paper backing off the Command strips and using my picture level to hang the board in our playroom!
Now the fun part! Get out your magnets (we used jumbo letter magnets and animal magnets) and watch your toddler delight in sticking and un-sticking them over and over again.

This board is such a fun addition to our playroom. I've had way too much fun decorating and furnishing this room for my little guy. We spend the better part of most days in this room, so it helps to have a fun space!
Did I mention that you can write on the board using Expo Markers? I love this for when Charlie is older and interested in spelling out words. I also think a board like this would be great for displaying kids' artwork or maybe a board to put in an office to stick reminders on. There are SO many possibilities!
Hope you enjoyed this idea! Thank you for stopping by!


